eTrk Windows Agent Installation
Prerequisites
1. Visual Studio Code 2022
Ensure you have the latest version of Mircosoft Visual Studio Code (2022 edition) installed. This IDE provides a robust environment for developing, debugging, and building .NET applications. You can download it from the official Mircosoft Visual Studio Code website.
2. .NET Runtime (version 8.0)
Install both the .NET SDK and the .NET Runtime (version 8.0) appropriate for your operating system. The .NET Runtime is necessary to run .NET applications and libraries. You can download the .NET Runtime from the official Microsoft .NET website.
Windows Users: Download the Windows Installer for .NET Runtime.
3. Microsoft Visual Studio Installer Projects Extension
Install the Visual Studio Installer Projects extension for managing your project builds, especially if you’re creating setup projects or installers for your application. This extension allows you to create installers for Windows-based applications using Microsoft Visual Studio. You can install it from within Visual Studio by navigating to Extensions . Manage Extensions, searching for “Mircosoft Visual Studio Installer Projects”, and installing it from the marketplace.
Clone the Repository
git clone https://github.com/Kumaran-eTrk/WindowsAgent.git
git clone https://github.com/Kumaran-eTrk/WindowsService.git
Installation Methods
There are two ways to install the eTrk Agent:
Using Executable Setup
1. Open Visual Studio Code 2022 Open Visual Studio Code 2022 to start setting up your project.
2. Create a New Project Create a new project in Visual Studio Code 2022.
3. Open the Files Open these files in your project Navigate to the Monitoruser and Monservice files.
4. Modify Configuration Update necessary configurations such as API URL, installation directory,Product key and time intervals in the appsettings.json file for Monitoruser and Replace the process path in the appsettings.json file for MonService.
Note
Add the ProductKey generated through the Web Portal. This key is utilized for security purposes to securely transmit data from this application to the server.
5. Create Setup Project Inside the project, create a new setup project by right-clicking on the project and selecting “Add”–>”New Project” –> “Setup Project”.
6. Add Project Output Create the Monitoruser folder and MonitorService within the application folder.
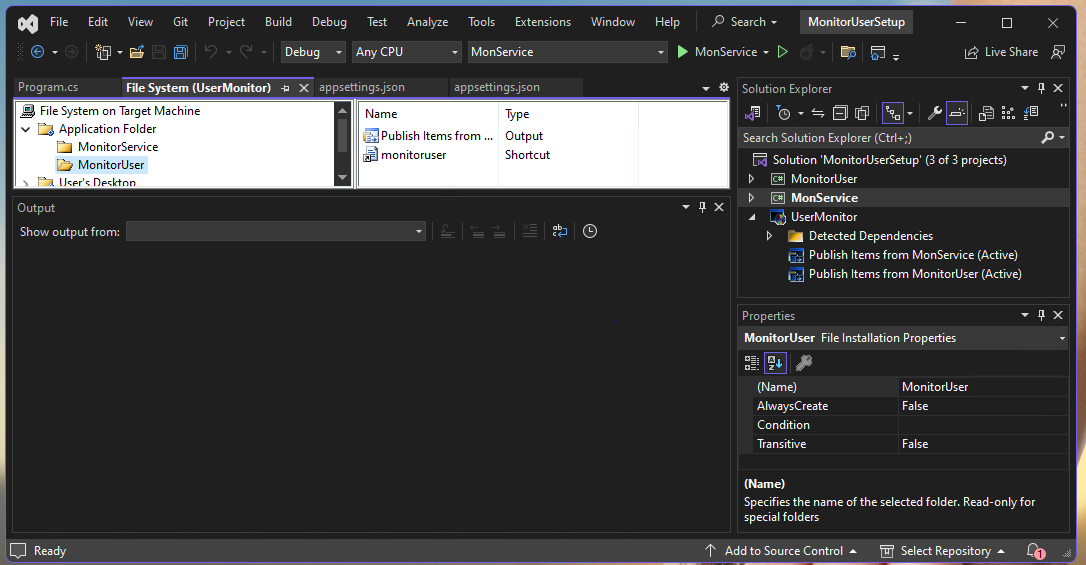
Right-click on the Monitoruser folder and add the project output. In the pop-up, select the project file Monitoruser and specify publish items in the text area box.
7. Right-click on the MonitorService folder and add the project output. In the pop-up, select the project file Monservice and specify publish items in the text area box.
To customize your shortcut with an icon, right-click the Application Folder in your Setup project, select “Add” → “File”, and import your desired icon file.
Note
The icon must be in .ico format and have a minimum resolution of 32 × 32 pixels.
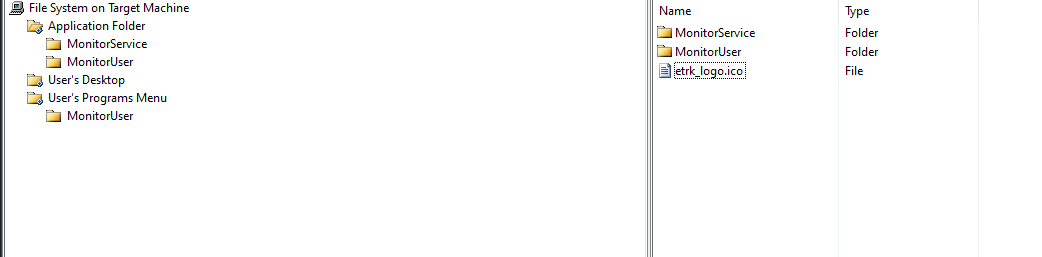
Then, for each shortcut, right-click and open the Properties window. In the “Icon” property, browse to the Application Folder and select the imported icon.
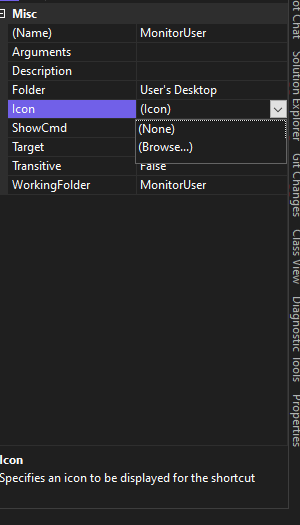
10. Build the Setup Project Right-click on the setup project and build the project.
11. Open the Setup Project in File Explorer Inside the Debug folder, you can find the setup file
Implementing the trigger functions in task scheduler
Open the task scheduler
Create the task
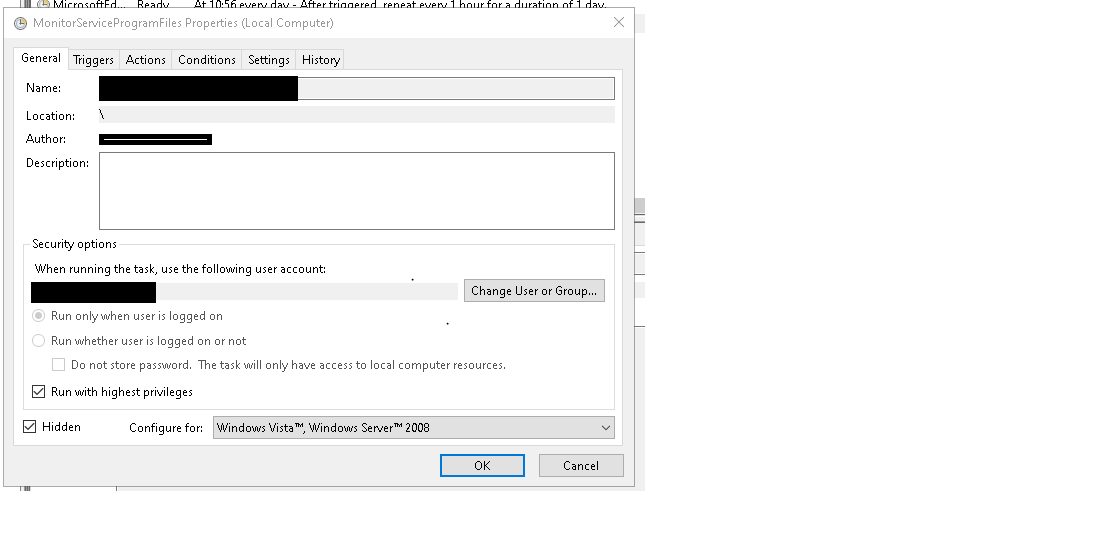
3. Go to the Triggers Tab –> Select New options. Please create a Schedule, Log on & Startup triggers and refer the below mentioned Screenshots**
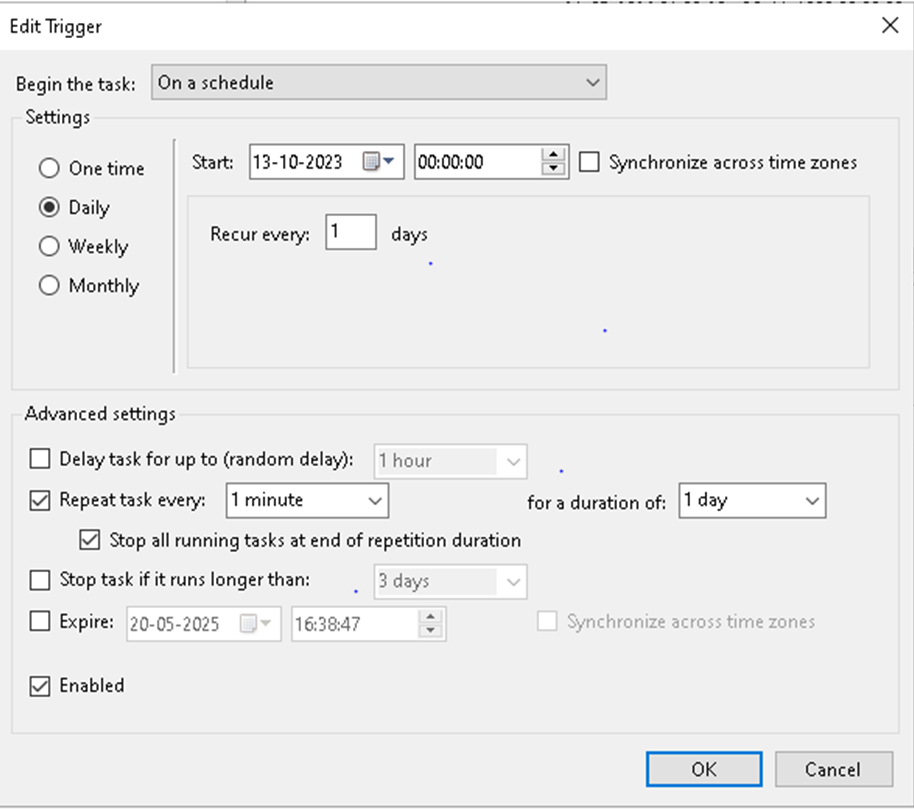
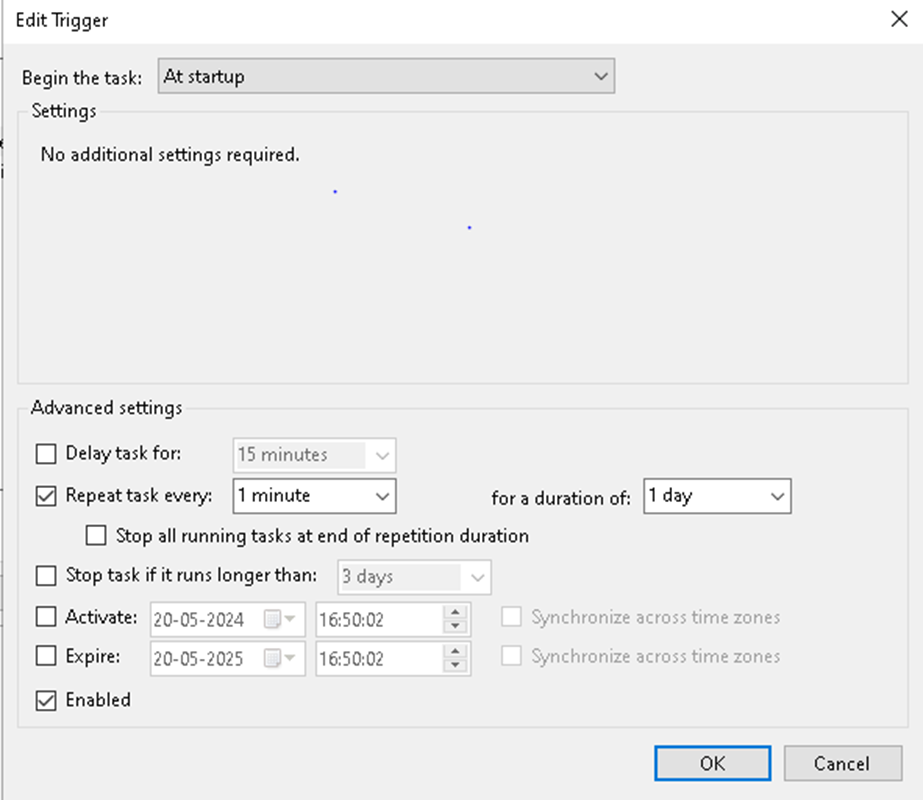
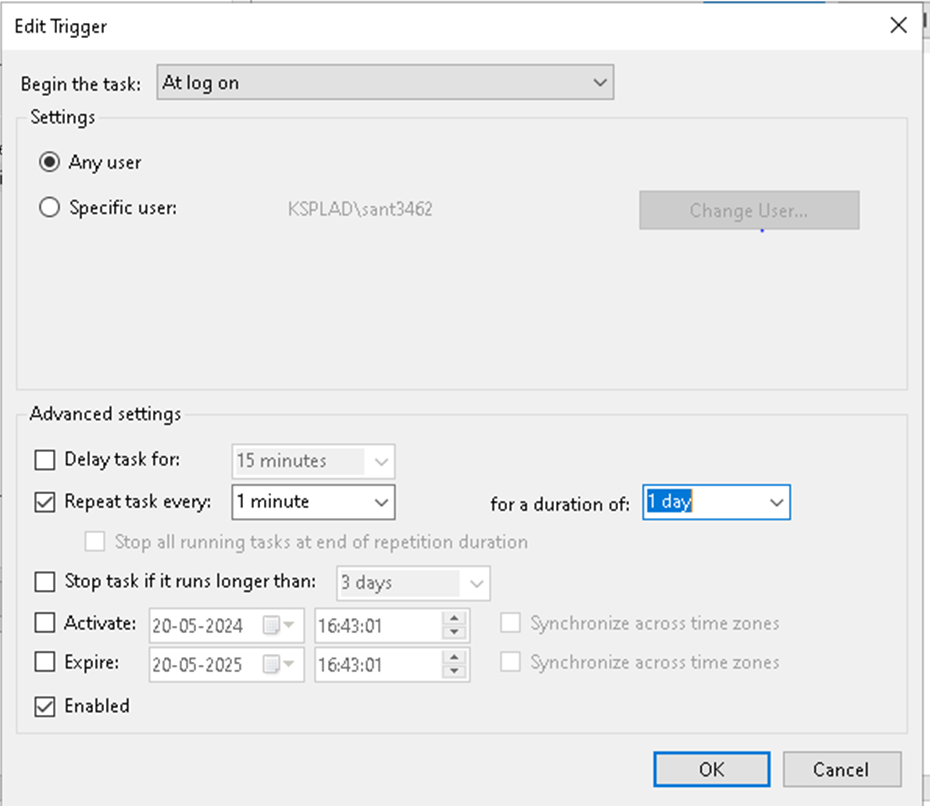
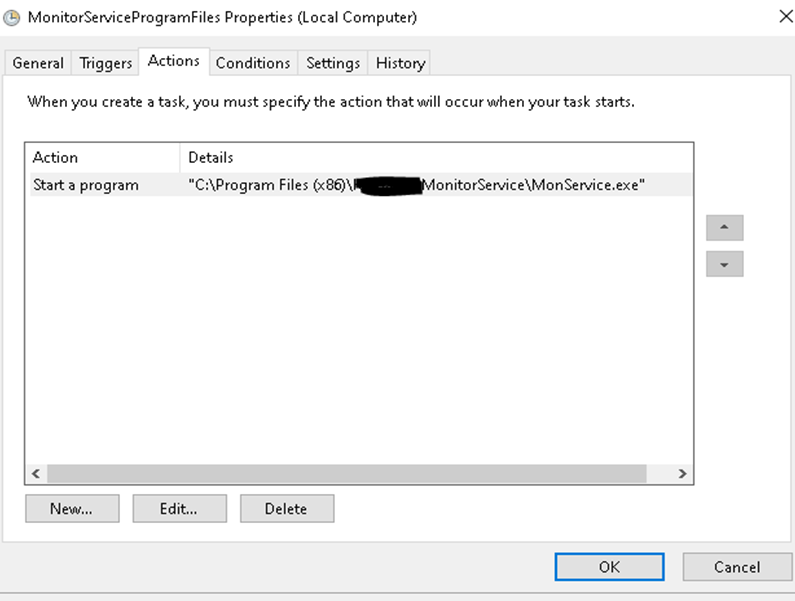
Go to the Action tab and Select New .Click Browse –> select installation path, Please refer below, we added the default location path
Program/Script - “C:\Program Files (x86)\<UserName>\MonitorService\MonService.exe”Start in – “C:\PROGRA~2\<Username>\MonitorService”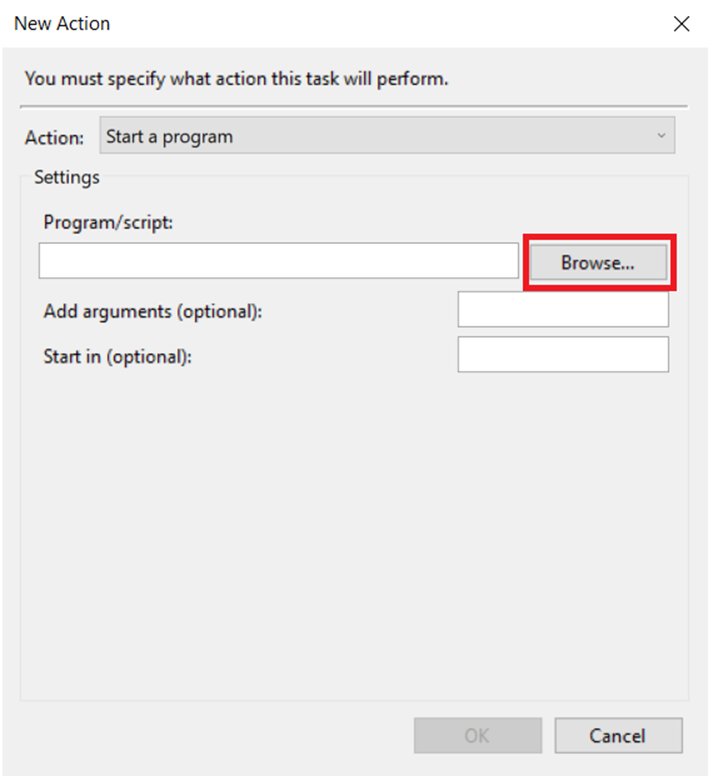
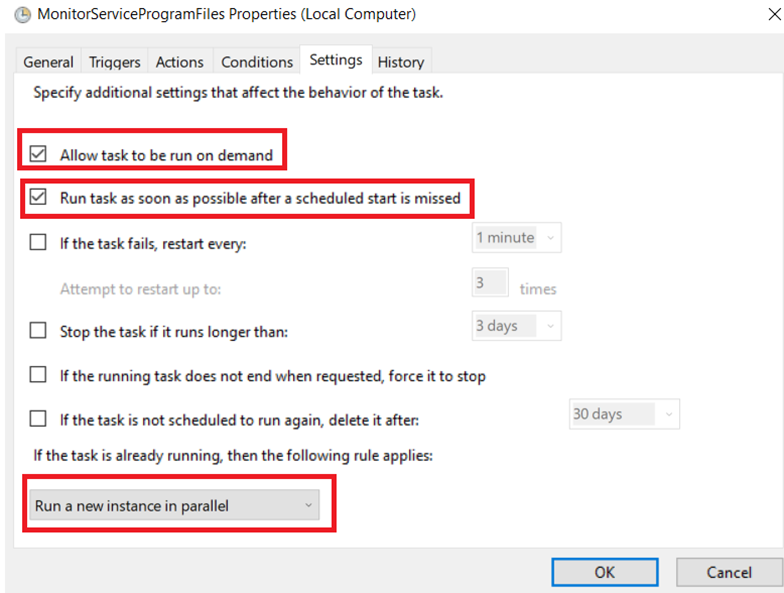
Go the Settings Tab,Modify the above changes
Finally , Run the Created task in the task scheduler.
Once the task is executed, the monitoruser command prompt will briefly appear, indicating that the software is running successfully.
Via PowerShell Script
Modify Configuration
Update necessary configurations such as API URL, installation directory,Product key and time intervals in the appsettings.json file for Monitoruser and Replace the process path in the appsettings.json file for MonService
Use the command to generate the publish folder for both MonService and MonitorUser projects.
dotnet publish -c Release -o Publish
Organize Published Artifacts
Create a directory named after your organization. Inside this directory, create two subfolders:
MonitorUser
MonitorService
Copy the respective publish outputs into these folders accordingly.
Archive and Upload
Compress the organization directory into a .zip archive and upload it to the designated shared path or cloud blob storage location.
Update PowerShell Deployment Script
Update the following variables in the powershellscript.txt file with the correct values:
zipUrl
blobUrl
runtimeUrl
sdkUrl
zipName
desinationPath
Also, update the TaskScheduler.xml file by modifying the executable path to reflect the correct location of the MonitorService.exe